Search This Blog

Friday, January 28, 2011

Lamb Shanks Slow Cooked over a Fire

Sometimes even well-laid plans come adrift. 

I have been wanting to try cooking lamb-shanks over a fire, so our holiday in the Drakensberg seemed like a good opportunity.  I stocked up on lamb-shanks for two, amongst other goodies, and off we went. One thing I forgot though - my big black flat bottomed cast iron pot.  Disaster!  How on earth was I going to cook two large, very awkardly shaped pieces of lamb, bone included?

Well, 'n boer maak a plan' as they say they the classics (in SA, anyway).  I did have a cast iron frying pan, and several tin-foil pie dishes, which I use when I'm making braai-packs.  So, we decided to fry everything up in the frying pan, and cook it in a tinfoil 'packet'.  And it came out so well, I want to try making it again - but maybe I'll use a pot this time!  Although - the clean-up was so easy,  all we had to do was chuck the tinfoil in the bin, and wash a few plates and things.

Here's the recipe, I hope you'll give it a try - when you have the leisure time to sit by the fire for the 3 to 4 hours this will take to cook!  Pour another drink, sit back and relax!


Lamb Shanks Cooked over a Fire

feeds 2 hungry adults (we ate late!)

2 lamb shanks
oil for frying
1 packet bacon braai rashers (thick cut bacon), sliced
1 large onion, sliced roughly
4 cloves of garlic, chopped
1 glass of red wine
1 tin of chopped tomatoes, with their juice
2 tsp sugar
1/4 cup chopped fresh rosemary
1 Tbsp Dijon mustard
Salt and freshly ground pepper

  • Start by making a fire, and heating the oil in the pan/pot
  • Fry the lamb shanks until they are well-browned, then transfer them to a tinfoil dish

  • Add the bacon pieces and fry until all the fat is rendered, spoon them over the lambshanks

  • Fry the onions in the bacon fat, add the garlic when the onions are softened, and fry together
  • Add the glass of red wine, the tin of tomatoes, the sugar, rosemary, seasoning and mustard, and bring to the boil
  • Pour the tomato mixture over the meat

  • Wrap a large piece of tinfoil around the entire tray, and seal loosely
  • Place on the braai grid, and keep the flames small but steady

  • Cook for at least 3 hours (pour several more drinks), checking regularly, add a little water if needed
  • Serve on mash or polenta - we had ours on mushy veggies, one of my favourite braai dishes:  boil together peeled, chopped potatoes, onions and garlic, and mixed veggies (whatever you have on hand, butternut, broccoli, carrots, even a pack of frozen mixed veggies) until soft, drain well, add a heap of butter, salt and lots of freshly ground pepper, mash together.  Delicious, I promise!
And here's the result - gorgeously tender, melt-in-the-mouth pieces of lamb in a rich bacon/tomato/herby sauce.  YUM, pretty good braai food!


We had this dinner by candlelight in our caravan - I do love camping!!!

Wednesday, January 12, 2011

Bread Rolls cooked over a fire

We're back from a wonderful week spent at Mahai Campsite in Royal Natal National Park in the Drakensberg Mountains - it was so peaceful, despite the fact that it rained for four days. We were forced to relax, which was good!

We did all our cooking over a braai-fire, even our bread (even if sometimes our fire was made under a beach umbrella), so I thought I'd share my favourite bread recipe with you, and the method for making bread-rolls over the coals.


Brown Seed Bread Rolls

3 1/2 cups of brown bread flour
1 sachet instant yeast (10 grs)
5 mls salt
1/2 cup of mixed seeds - I used poppy, sunflower, sesame and linseeds
30 mls syrup or honey or sugar
60 mls of oil
1 to 2 cups of luke-warm water

  • Mix together the dry ingredients
  • Add the honey and oil, stir slightly
  • Add the warm water slowly, while stirring, until the flour binds into a dough
  • Continue stirring with your spoon until the mixture is ready to tip out
  • Lightly flour a large bread board or clean table, and tip the dough out onto it
  • Knead gently but thoroughly until the dough is very smooth, and elastic when stretched

  • Lightly oil a clean bowl, and place your dough in it, cover with a clean cloth and set aside somewhere warm to rise
  • When the dough has doubled in size, knock it back, and press out flat until about 1 inch thick
  • Cut out circles with a glass or cookie cutter - don't make them too big, the dough should yield about 16 rolls
 
  • Flour the tops as well, and set aside, covered, to prove
  • Get the fire going, you will need a bed of of coals for a gentle heat

  • Place the rolls directly on the grid and allow to cook, turning them over frequently

 
  • The rolls are done when they sound hollow when tapped.
  • The whole process should take about 2 hours, and there is nothing as good as a hot bread roll baked over the coals!
Enjoy!  We had our hot bread rolls with some warmed-up left-over braaied kassler ribs - with plenty of mustard, these were the ultimate 'burger'!


Monday, November 8, 2010

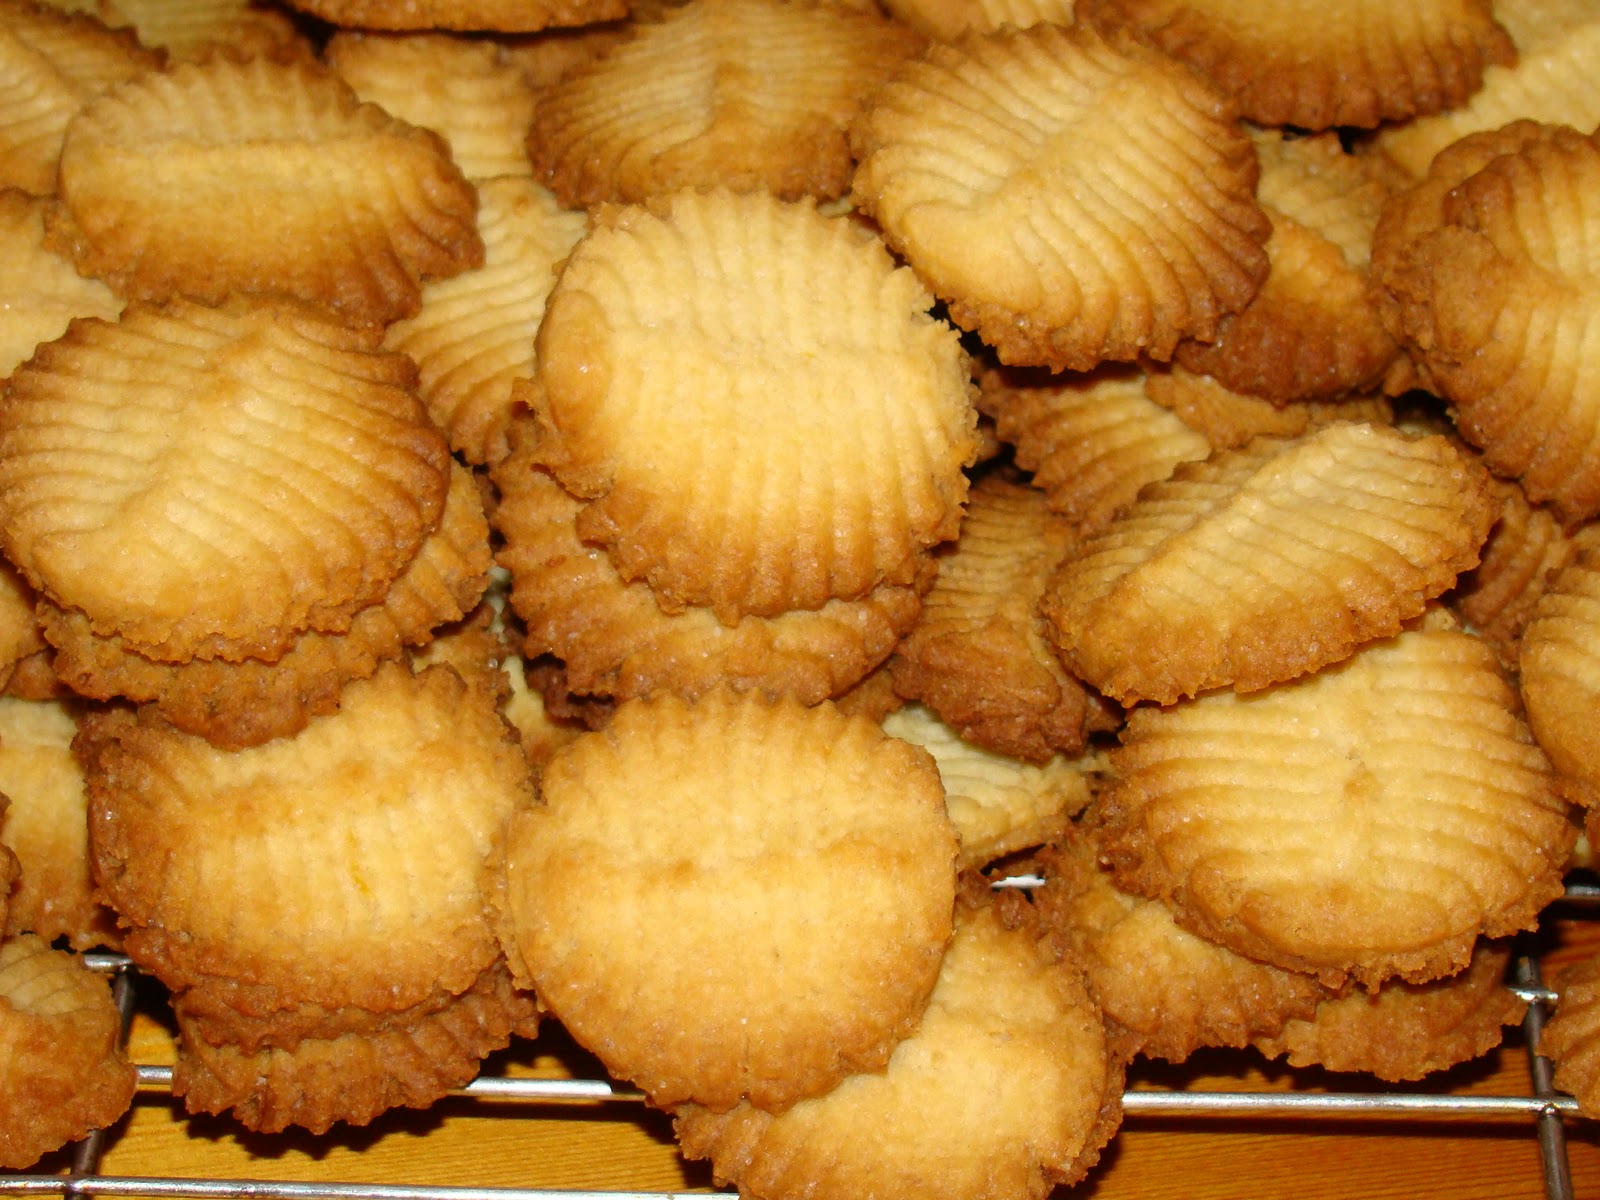
Condensed Milk Biscuits

When we go camping, or traveling anywhere for that matter, I always try to bake a batch of home-made biscuits.  People seem to need something to nibble on more often when on holiday, and these crisp biscuits travel well and are delicious.  The recipe makes a big batch of biscuits. 


Condensed Milk Biscuits

5 cups of cake flour
1 cup of cornflour (Maizena)
4 tsp baking powder
pinch of salt
500 grs butter
1 cup of sugar
1 tin of condensed milk
3 Tbsps aniseed OR grated rind of 2 lemons OR glace cherries (optional)

  • Cream the butter and sugar
  • Add the condensed milk, and mix well
  • Mix together the dry ingredients, including either the aniseed or the lemon rind
  • Stir the dry ingredients into the creamed mixture
  • If the dough seems very soft, chill for 15 to 20 minutes
  • Either roll the dough out and cut with cookie cutters, or roll into little balls and squash slightly with a fork or press out with a biscuit gun

  • Place the biscuits on baking trays (decorate with cherries if you wish) and bake for 10 minutes at 180 degrees C, until slightly browned - be careful not to burn them

  • Cool on a cake rack
  • Pack into plastic jars suitable for traveling when cold.
These are really good with a cup coffee brewed on a camp-fire, perhaps sitting under a giant wild-fig tree, or watching dolphins and whales play in the sea in front of your camp site!

Monday, October 25, 2010

Aniseed Rusks

I haven’t been posting regularly since we haven’t been camping much this year, but as the year draws to a close, my thoughts turn to holidays and food. Absolute bliss, I can’t wait to pack our caravan and head out into the fresh air for some peace and quiet.

As we usually camp somewhere remote, I have to plan our meals carefully, and take everything along. (For more on planning meals, please look HERE). I do a lot of baking before we go, to make sure that there is plenty to snack on – somehow, being in the open air, and getting lots of exercise, makes one so much hungrier!

I always bake a batch of rusks to take with. Rusks are a South African tradition, a sweet bread-dough, formed into little balls and baked in a loaf tin, then separated, and dried out over-night in a low oven. The crisp, sweet rusks are absolutely delicious dunked into a cup of coffee, or tea, and make an excellent quick breakfast.

Rusks come in many variations - I am sharing my mother's recipe, which she got from her mother. It’s easier than most recipes, being made with self-raising flour, not yeast. Rusks are often made with buttermilk or muesli, too.

This batch is a classic aniseed rusk, another firm favourite in SA, and my favourite too.  If you don't like aniseed, leave it out.


Aniseed Rusks

3 x 500 grs packets self-raising flour
1 dsp salt
250 grs butter
1 1/2 cups sugar
2 + 1 cups of milk
3 eggs
2 or 3 tbsps aniseed
  • Mix together the flour and salt, rub in the butter.
  • Dissolve the sugar in 2 cups of milk (set the other cup of milk aside, to use if your mixture is too dry).
  • Cool the milk mix to luke-warm.
  • Whisk the eggs, beat into the milk and sugar.
  • Stir the milk mixture into the flour with a wooden spoon, adding extra milk if needed.
  • Turn out onto a floured surface, knead very well, at least 150 times! until smooth and elastic (even though it’s not a yeast mixture, this step is necessary).
  • Squeeze off balls of dough, tuck them into greased pans (the batch will fill 3 loaf tins)


  • Bake at 180˚C until well-risen and golden brown.

  • Turn out onto cake racks, cool until you can comfortably handle the loaves.

  • Very gently ease the rusks apart, and lay out onto your oven racks to dry.
  • Dry out for at least 12 hours at a very low heat, 50˚C, leaving the oven open a crack to allow air to circulate.

I usually pack the rusks in the oven at night, and leave them until morning, then turn the oven off and leave them to cool completely. Test them the next morning (have one with a cup of coffee!) or break it in half to make sure they are dried out right through. When they are completely cold, pack them into air-tight containers, they will keep several weeks.


Rusks are delicious dunked in an early-morning cup of coffee, especially when you are camping, or as an afternoon snack.

Happy camping!

Friday, June 11, 2010

Friday Photos

Today I am sharing a few of my favourite photos, taken on our trip to the UK in 2007.  England is incredibly beautiful, and I especially enjoyed the flowers and gardens.  Hope you enjoy these.


Have a wonderful weekend!

Tuesday, June 8, 2010

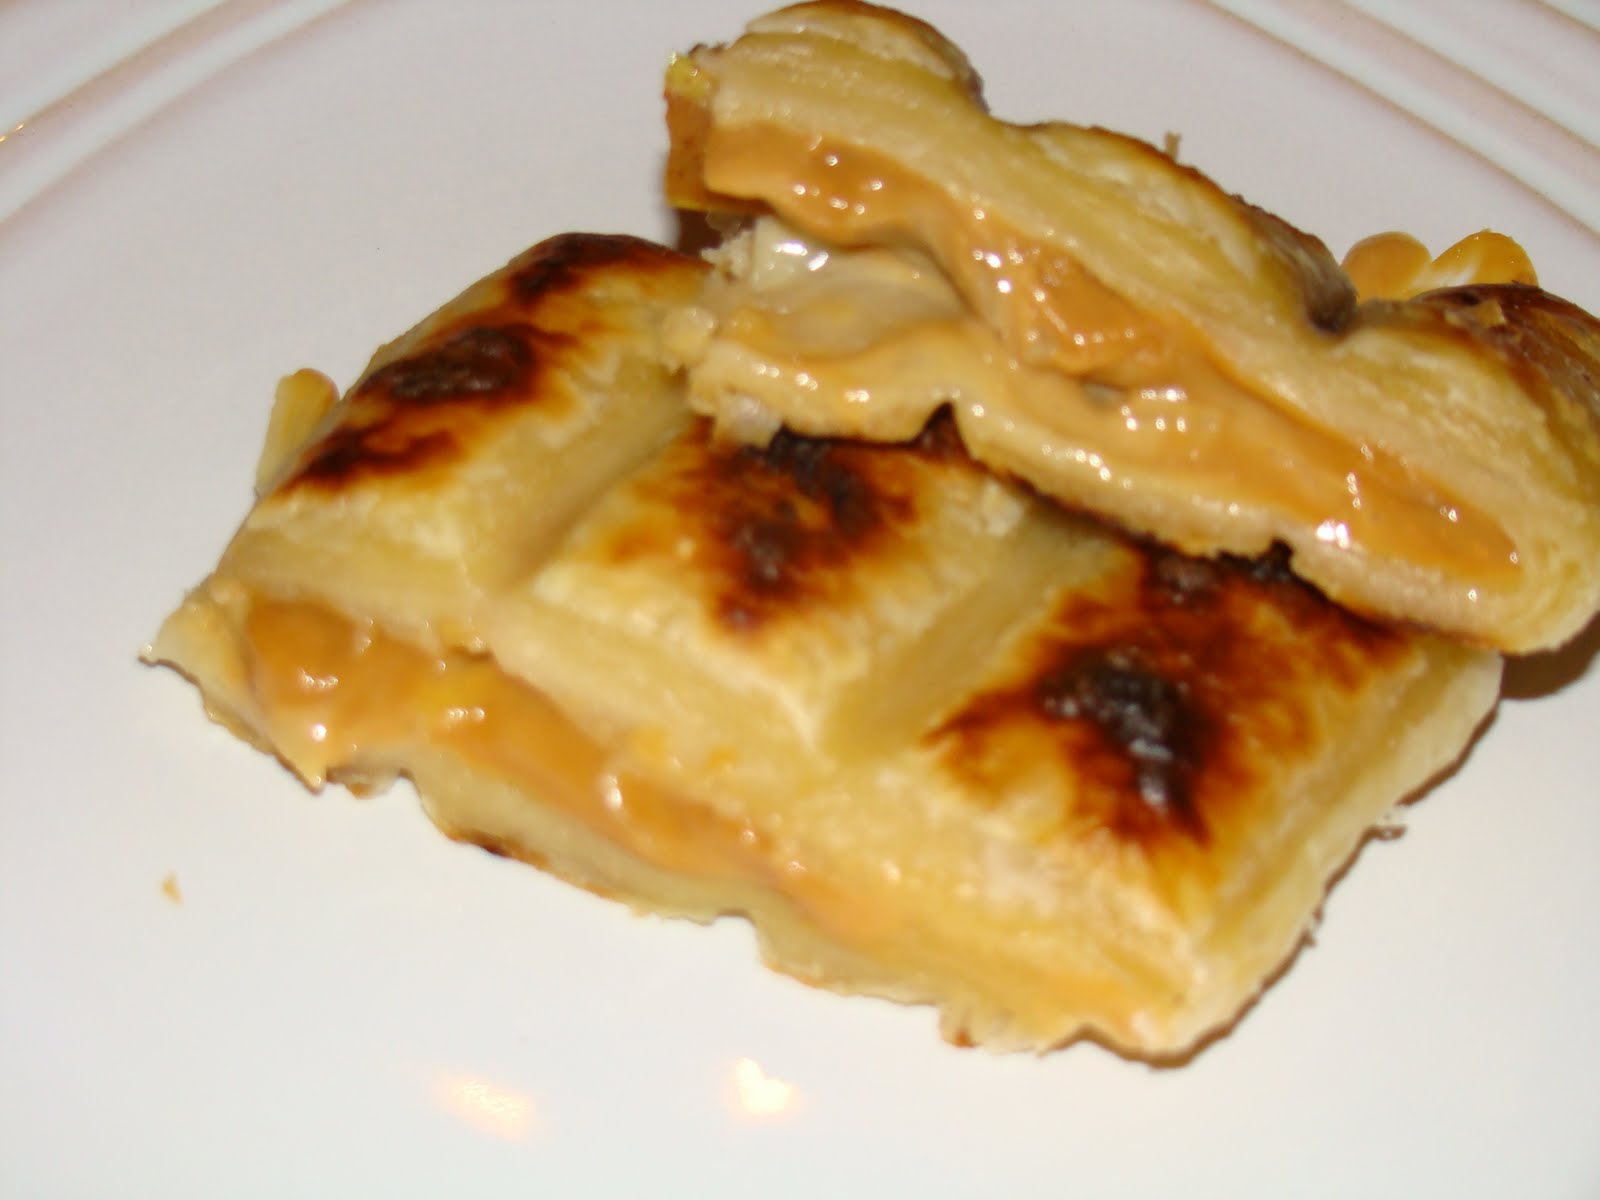
Pear, Almond & Caramel Braai Pie

Here's an interesting dessert to make next time you are camping. It doesn't need much in the way of ingredients, the trickiest one being the frozen puff pastry, but that won't take up much room in the cooler box!


Pear, Almond & Caramel Braai Pie

lightly oil a braai grid, for cooking your pie over the coals


1 packet of puff pastry, completely defrosted
1 small handful of almonds
1/2 tin of Caramel treat (caramelised condensed milk)
1 ripe pear or a few tinned pear halves

  • Roll out the pastry (a wine bottle will do nicely as a rolling pin)
  • Spread the caramel treat over one half, leaving a border for crimping
  • Sprinkle with a handful of almonds
  • Layer on thinly sliced pear
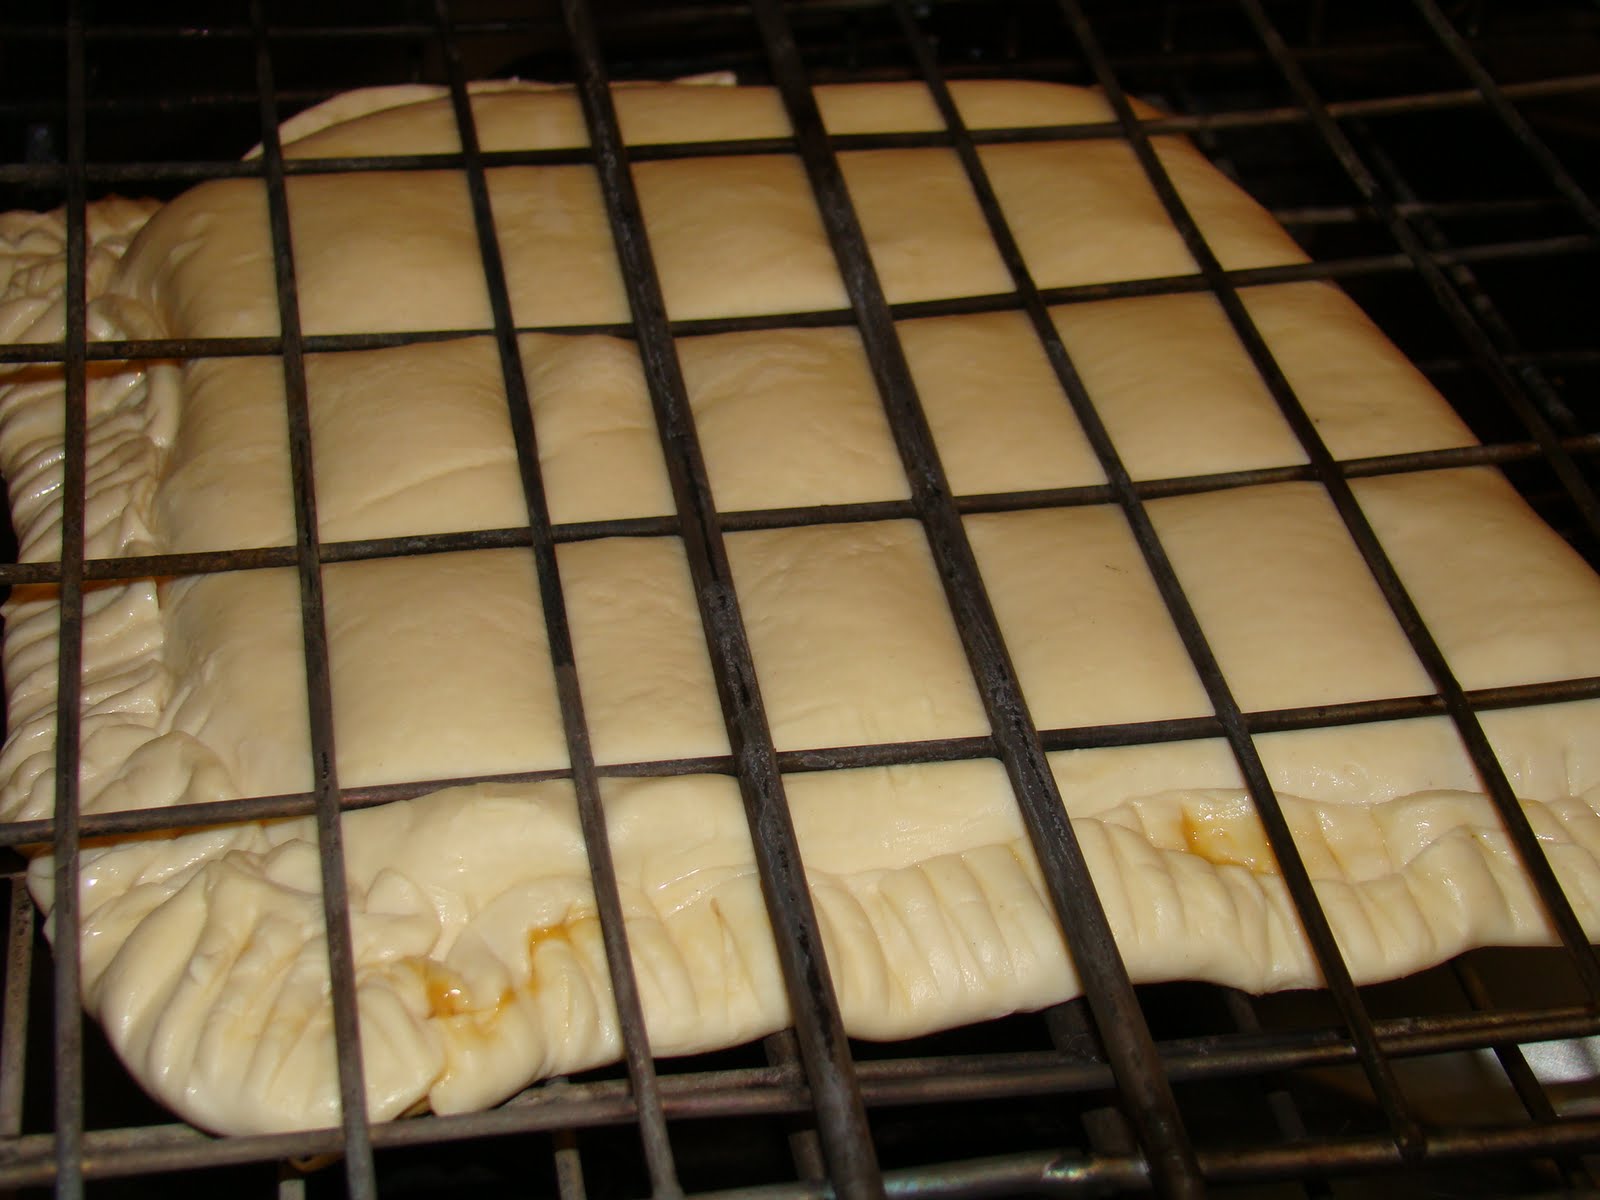
  • Fold the plain half of the pastry over the filling,  smear with a little milk around the edges, and seal well.
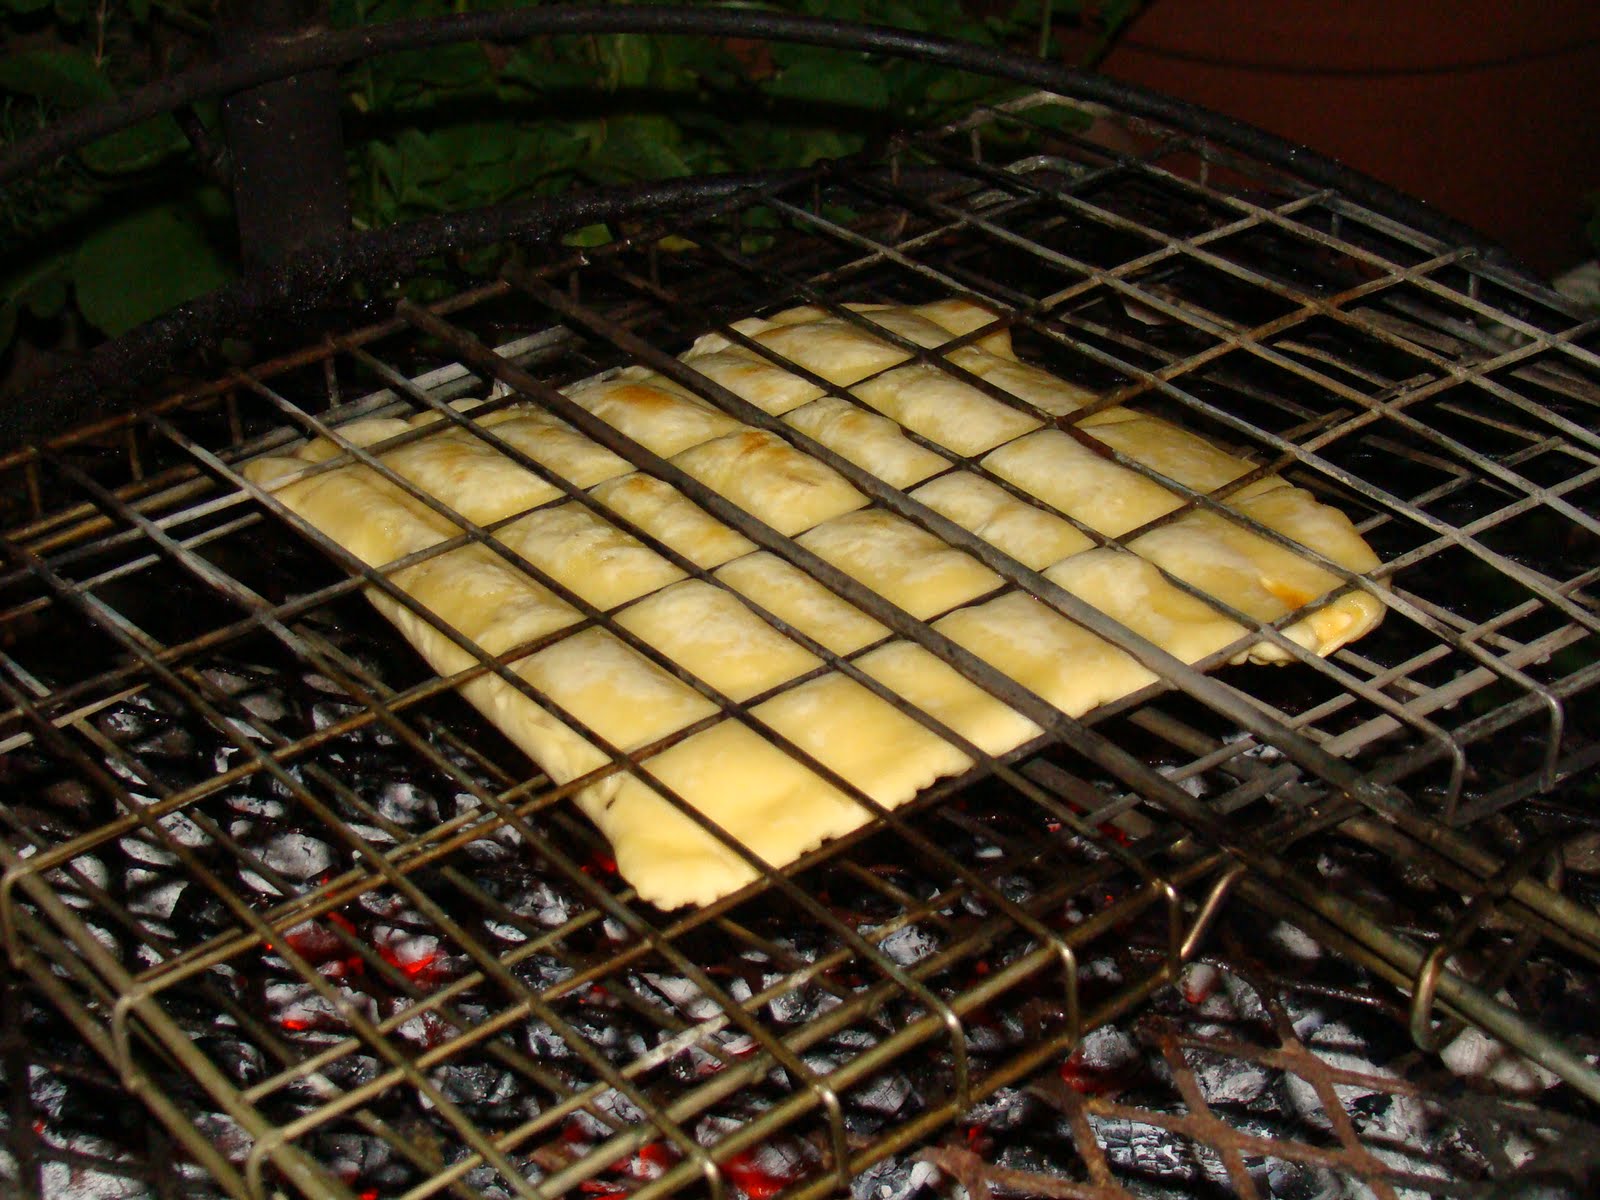
  • Gently lift the dough onto the braai grid, and close and lock it
  • Bake over very hot coals, turning frequently until crisp and puffed and golden


Slice and enjoy!

This method would work really well for a camping lunch-time, too - sprinkle with grated cheese, left-over braai meat, or a tin of something yummy, and cook a pie for lunch on the fire.

Let me know what you come up with!

Friday, June 4, 2010

Friday Photos

Yesterday I told you a little about Maphelane, the beautiful beach and forest, and the creatures.  Today, let me show you!  This Friday's photos are all of that area, I hope you enjoy them.....

the beach and forested sand dune


such a perfect beach


looking away from the forest dune


ghost crab at sunset


and ghost ships on the horizon


suppertime visitors - a very tame bushbaby


the dune forests


the view from the top of the dune on the beach


have a wonderful weekend!

Thursday, June 3, 2010

Camping at Maphelane

Maphelane is a beach camp on the far north coast of Kwazulu-Natal.  It is part of the St Lucia wetlands and coastal forest area, and the dune forests and beaches are so beautiful.  It is however, very wild and remote.

This area is a popular holiday destination, especially with fishermen, but it certainly isn't luxurious, actually, the word 'rustic' is complimentary!

The first time we went there we stayed in one of the slightly ramshackle wooden cabins, which was comfortable, but the camp caretakers were fighting a losing battle against the cabins being re-claimed by the forest - everything living, plant and animal, was trying to move in. There's a LOT of life in an African tropical coastal forest.

We went for a walk to the campsite one day, and I fell in love with camp number 33.  The campsite is situated on a long sandy corridor, stretching back into the forest from the beach. The very last site, number 33,  is tucked into the dune forest, and is so beautiful, that I started planning to camp there.

I had to wait until we had a 4x4, though - the road through the forest over the dune (read 'mountain') is impossible for a caravan without a 4x4 vehicle - sandy, hairpin bends, steep inclines, it's quite a road.

We finally got to camp there last January.  The campsite was as beautiful as I remembered, the ablutions were spotlessly clean and well-maintained, the beach magnificent - the biggest drawback is the camp water.

We knew there was no electricity, this is after all a very remote area, and with a gas fridge and freezer we were fine.  The camp runs a generator (far from the campsite) from 6 am to 10 pm to provide some power, so we hired a plug point at the workshops, and took along a small electric fridge.  This, of course, was for the beers......

But - Maphelane does not have drinking water.  There are rainwater tanks, and the water can be drunk (after treatment), but we brought along our own fresh water.  Trouble is, the water for washing in the kitchen and ablutions is all ground water, and it was brown - literally brown, and slightly sticky, as it was brackish water. High salt and soil content - and this is all that is available for washing dishes and yourself.  By the end of the week, we were all longing for clean, fresh water showers!

Camping in the forest was wonderful, the bush is alive with creatures.  Bird life is prolific - some good sightings were a woodland kingfisher, and the rare palm-nut vulture. Masses of butterflies, and regular visits from the local troupe of vervet monkeys by day and bushbabies by night entertained us.  Vervet monkeys are very cunning thieves, always on the look-out for a meal.  They can do a lot of damage, so one needs to be on the watch when they come around.  Everything needs to be strapped and locked down when one leaves camp.

The bushbabies were so cute, I didn't know they could get so tame. One little chap made a pest of himself, wondering around between our feet in the evenings like a little cat.  We were careful not to try pet it - after all, it was a wild creature.  Bushbabies have a loud cry which can be really alarming, they sound for the world like a baby lost and in distress!  And they are loud!

It was a wonderful camp, but we won't be in a hurry to go back - the road took our caravan apart and Andre is having to re-build bits of it.  I'll put some photos up to show how beautiful this place is tomorrow!

Til next time....

Friday, May 28, 2010

Friday Photos

I'd like to share some holiday and/or interesting photos with you each Friday. 

To start with, 'they' say one should get to know your own area first before you start to travel.  Well, in 2008 I gave my husband a flying lesson as an anniversary gift - I went along to take photos (scariest thing I ever did, flying in that small plane - and I like flying).

These are photos of our city Pietermaritzburg, taken on a dusty winter's day.  I hope you enjoy them!

The plane


 Take off


The city 


Midmar Dam in the distance 


The Quarry 


 Turning back towards the airport


 The city again


 Nearly on the ground again


Have a wonderful weekend!

Tuesday, May 25, 2010

Spicy Pork Braai Packet

Right - time to get to cooking on the fire!

Here is a favourite dish that we cook on the fire often, and it's a good example of the type of food we cook when camping - a pack of vegetables and meat, cooked in a tinfoil packet until tender, moist and full of flavour.  This method is very open to experimentation,  and I find each time I make it, it comes out a little different.  Also, clean-up afterwards is minimal!

On the menu were some pork neck chops, and instead of doing the usual braaied chops, with potatoes in foil and a salad, I decided that an all-in-one tinfoil pack would be good.  Inspired by stir fry-type flavours, I added all sorts of ingredients and in the end we had one of the most delicious packs ever. 


Spicy Pork Braai Packet

4 pork neck chops, bones removed and cut into strips
Marinade:
3 Tbsps soy sauce
1 Tbsp Worcester sauce
1 tsp English mustard
1 tsp ground ginger
1 tsp ground cinnamon
1 tsp turmeric
1 tsp paprika
Vegetables:
1 large onion, sliced
3 medium potatoes, sliced
4 carrots, julienned
1/4 head of broccoli, broken into florets
large handful of button mushrooms, sliced
1 red chili, sliced
olive oil
butter


  • Mix the marinade ingredients very well, and work through the meat strips, making sure that they are well coated
  • Prepare all the vegetables, then layer them in your tinfoil roasting dish
  • Start with the onion, and drizzle a little olive oil over them
  • Next layer the potatoes, the carrots, the broccoli, then add a few dollops of butter
  • Lastly layer on the meat, chili, and mushrooms
  • Now make a lid of tinfoil, and seal the packet rim very well - this is important, as it will keep all the juices in, and steam the food until the flavours are mingled and delicious


Place over hot coals on the braai grid, and allow the heat to puff the packet up.  It should take about an hour to cook. Watch the packet, while there are small jets of steam escaping, there is still moisture inside. When the steam stops, your packet is done.


Remove from the fire, tear open and serve - the flavours have to be tasted to be believed, and the chillies add a lovely fresh bite.

Enjoy!